geoBlock
Block players from certain countries from joining the server.
Hooks
- IPDetected - Regex: , Event Type:
player-new-ip-detected
Config variables
- mode string - If set to allow, only players from the specified countries will be allowed to join. If set to deny, players from the specified countries will be banned from the server.
- countries array - List of countries
- ban boolean - Ban players from the server when they are detected. When false, players will be kicked instead.
- banDuration number - Duration of the ban.
- message string - Message to send to the player when they are kicked or banned.
Core Functionality
- Country-based access control
- Configurable action settings (kick or ban)
- Customizable ban duration
- Immunity system through role permissions
- Custom messages for blocked players
Operation Modes
- Allow Mode: Only players from specified countries can join
- Deny Mode: Players from specified countries are blocked from joining
Configuration Options
Essential Settings
-
Mode Selection
- Allow: Whitelist mode - only listed countries can join
- Deny: Blacklist mode - listed countries are blocked
-
Action Settings
- Ban (default: enabled)
- Ban Duration (default: 24 hours)
- Custom Message (default: "Your IP address is banned.")
-
Country List
- Comprehensive list of countries to allow/deny
- Countries are selected using standard two-letter country codes
- Multiple countries can be selected simultaneously
Permissions
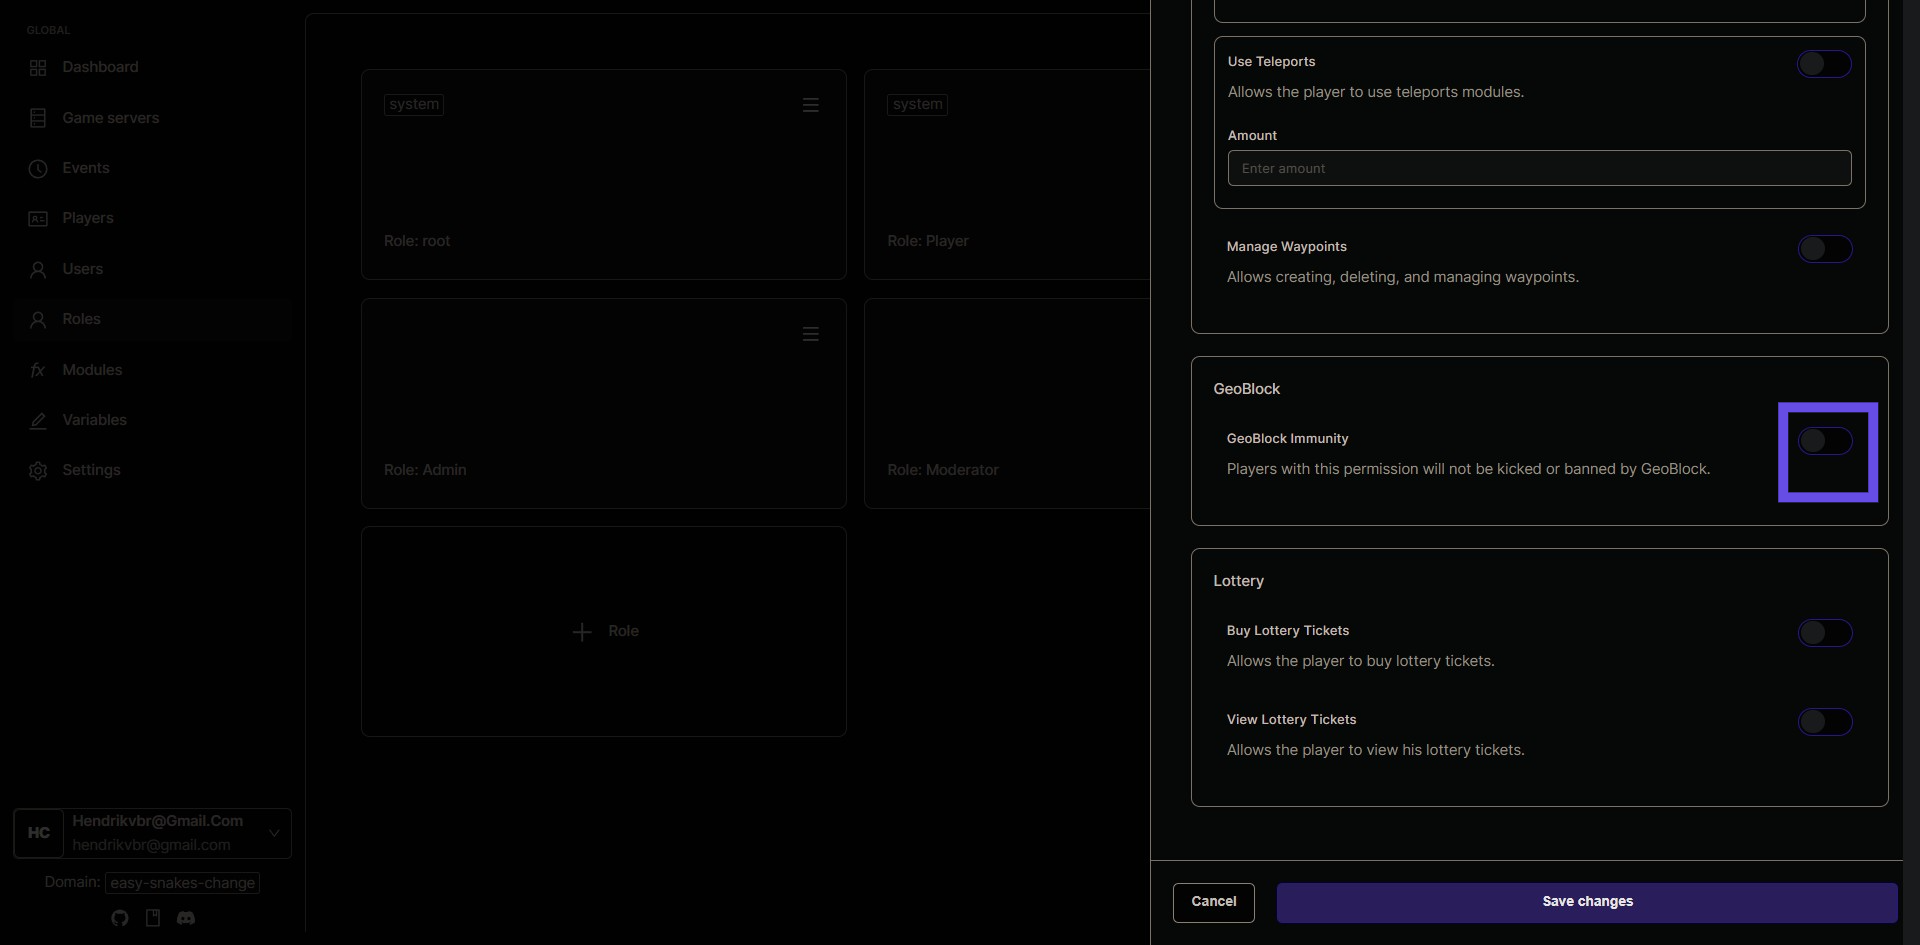
GeoBlock Immunity
- Permission Name:
GEOBLOCK_IMMUNITY - Description: Players with this permission will not be affected by GeoBlock restrictions
- Cannot have count value (boolean permission)
How to Install and Configure the Geoblock Module
This guide explains how to install the Geoblock module, select countries to ban, and create roles to grant immunity to players from banned countries. Follow these steps to effectively manage your game server's access control. You can find more info related to built-in modules in built-in modules.
Install the module to your game server
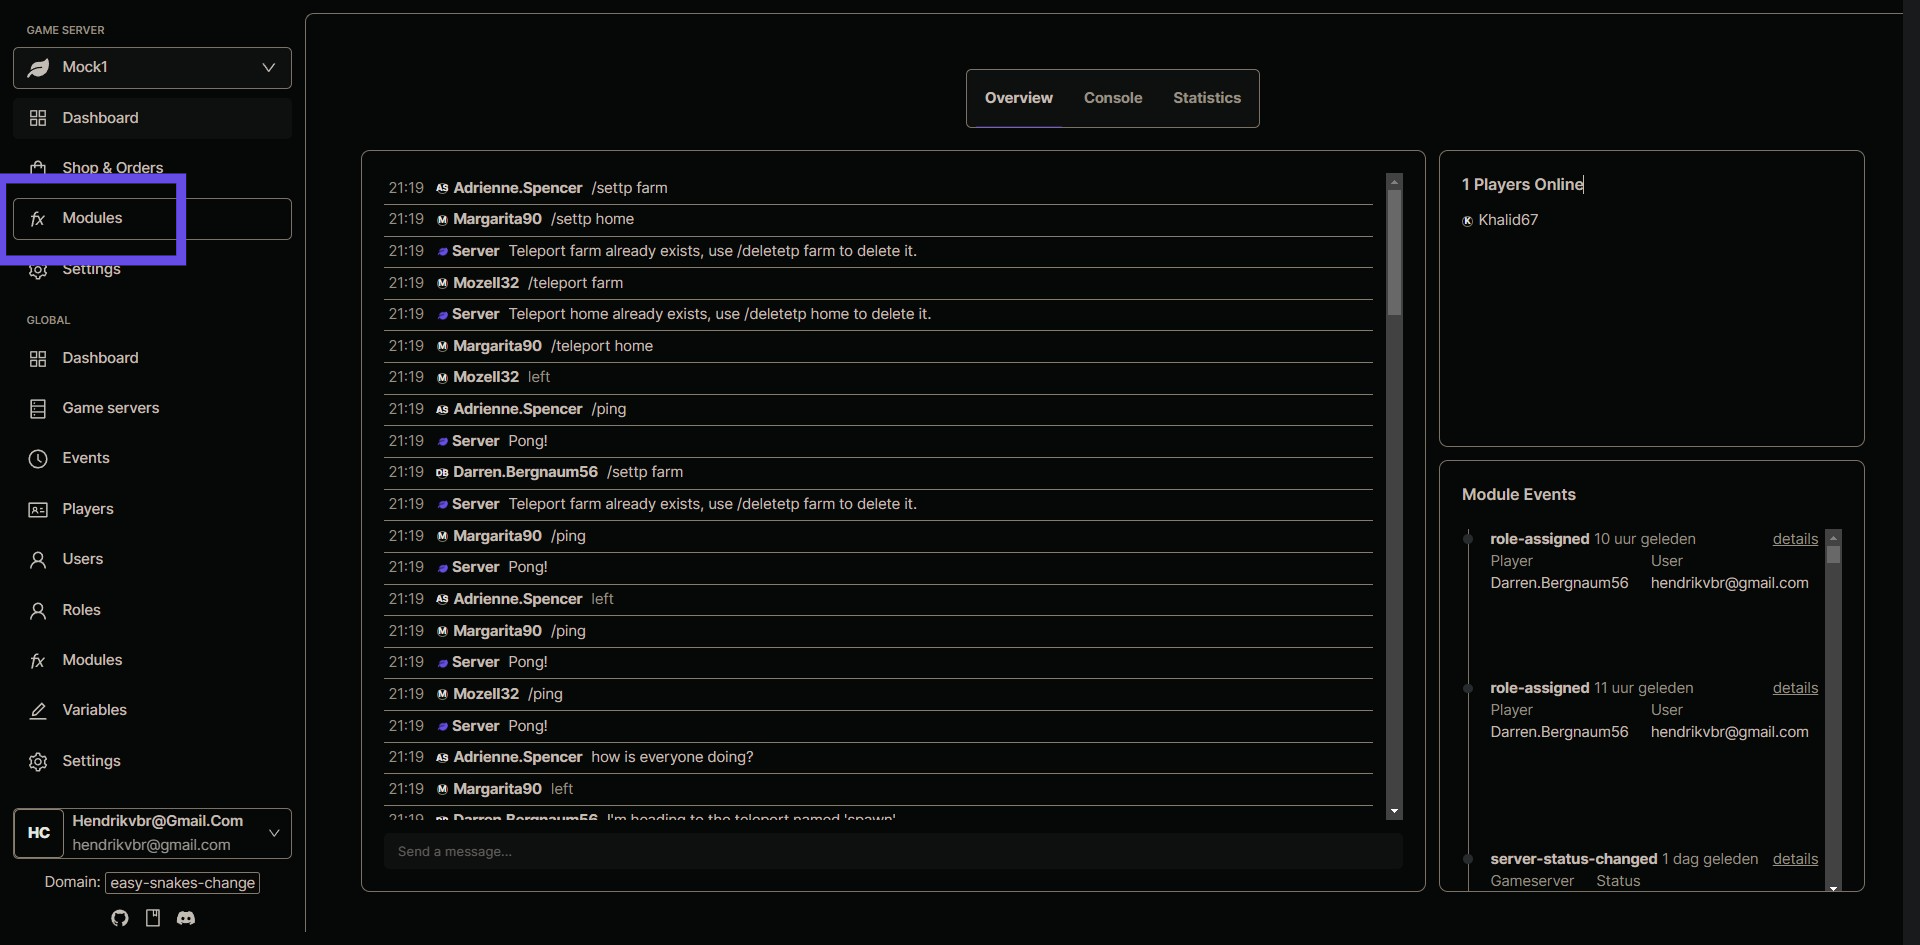
Step 1: Navigate to the Modules Section
Go to the main menu and find the 'Modules' section in your game server's administration interface.
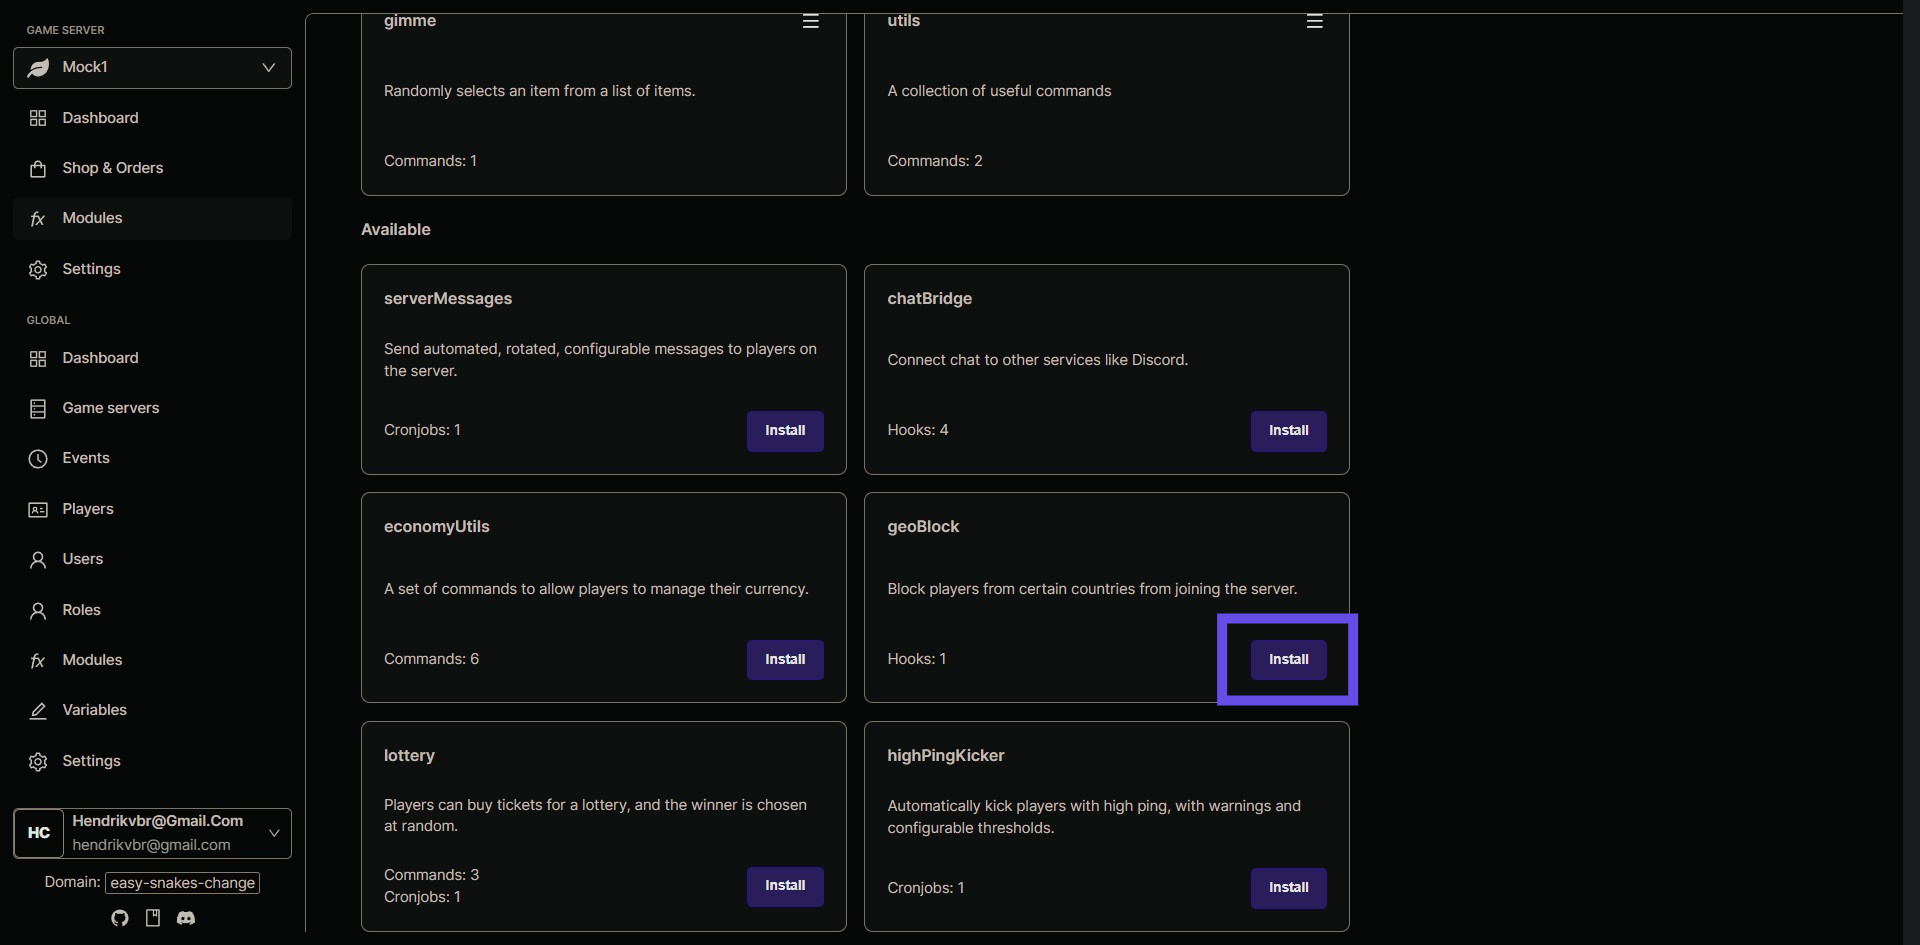
Step 2: Start the Installation
Click on the 'Install New Module' button and search for the 'Geoblock' module in the list of available modules.
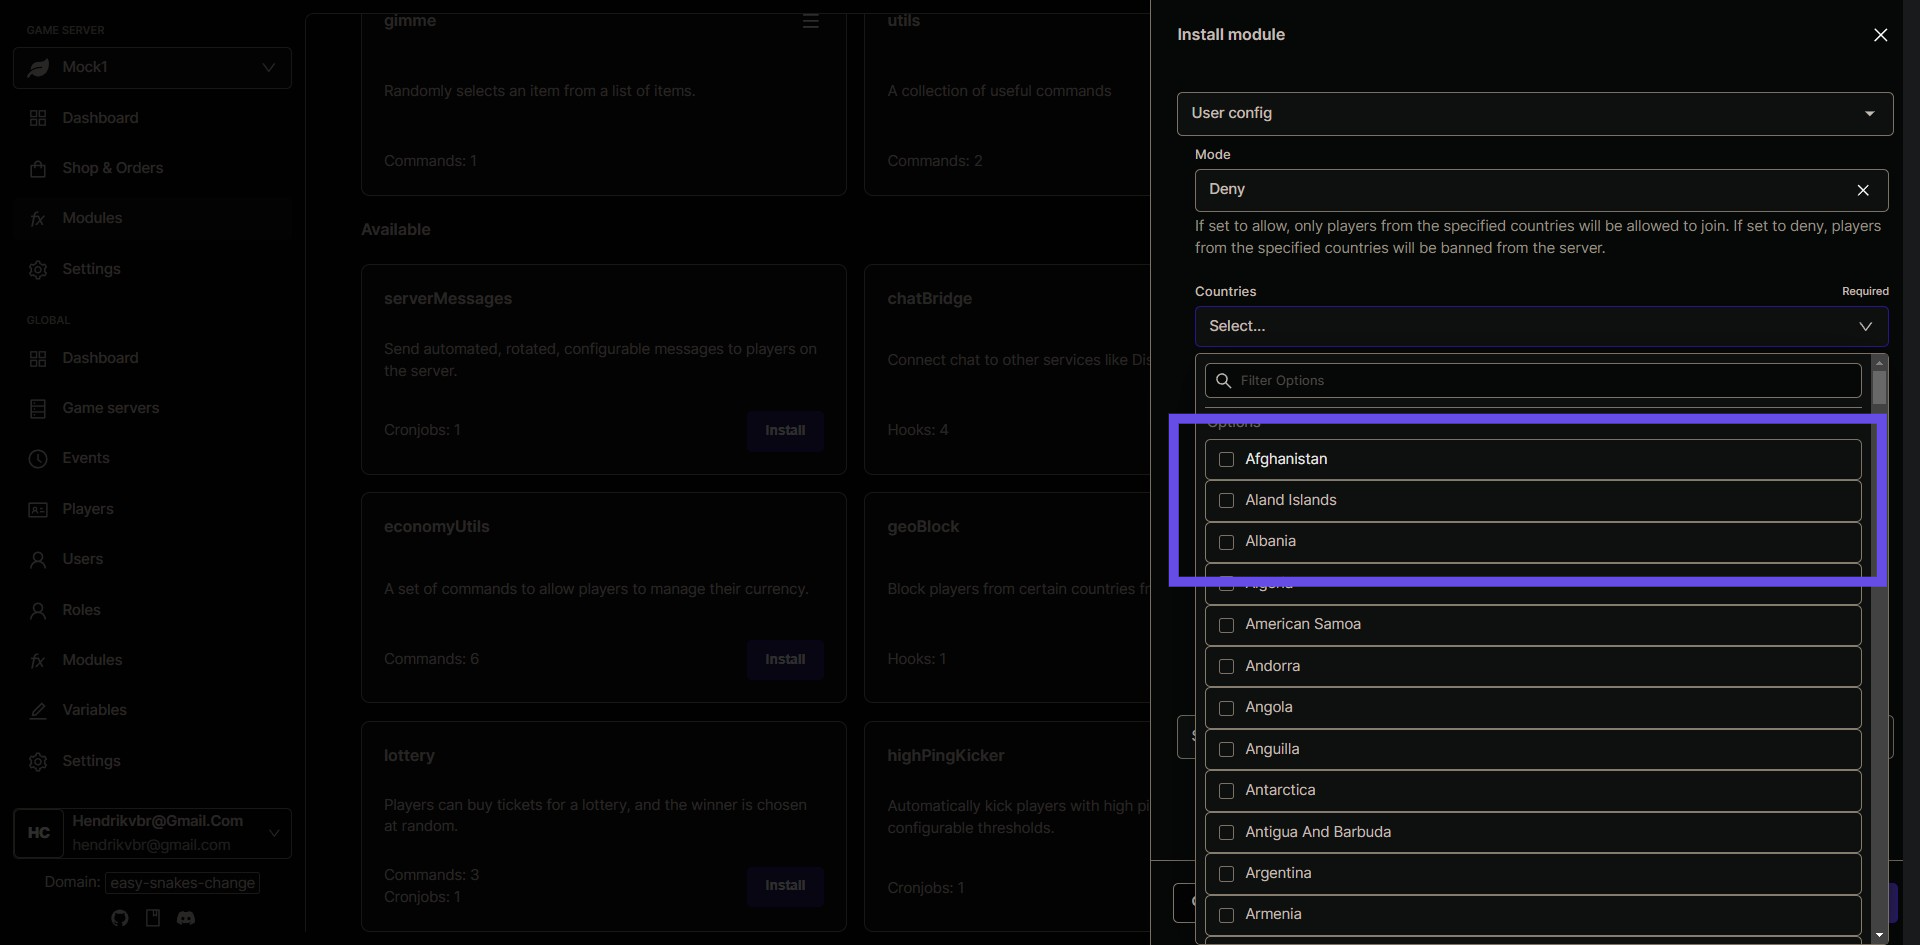
##$# Step 3: Select Countries to Block
During the installation process, you'll be prompted to select the countries you want to block. Use the provided interface to choose the countries from the list.
#$## Step 4: Install the Geoblock Module
After selecting the countries, click the 'Install' button to complete the installation of the Geoblock module.
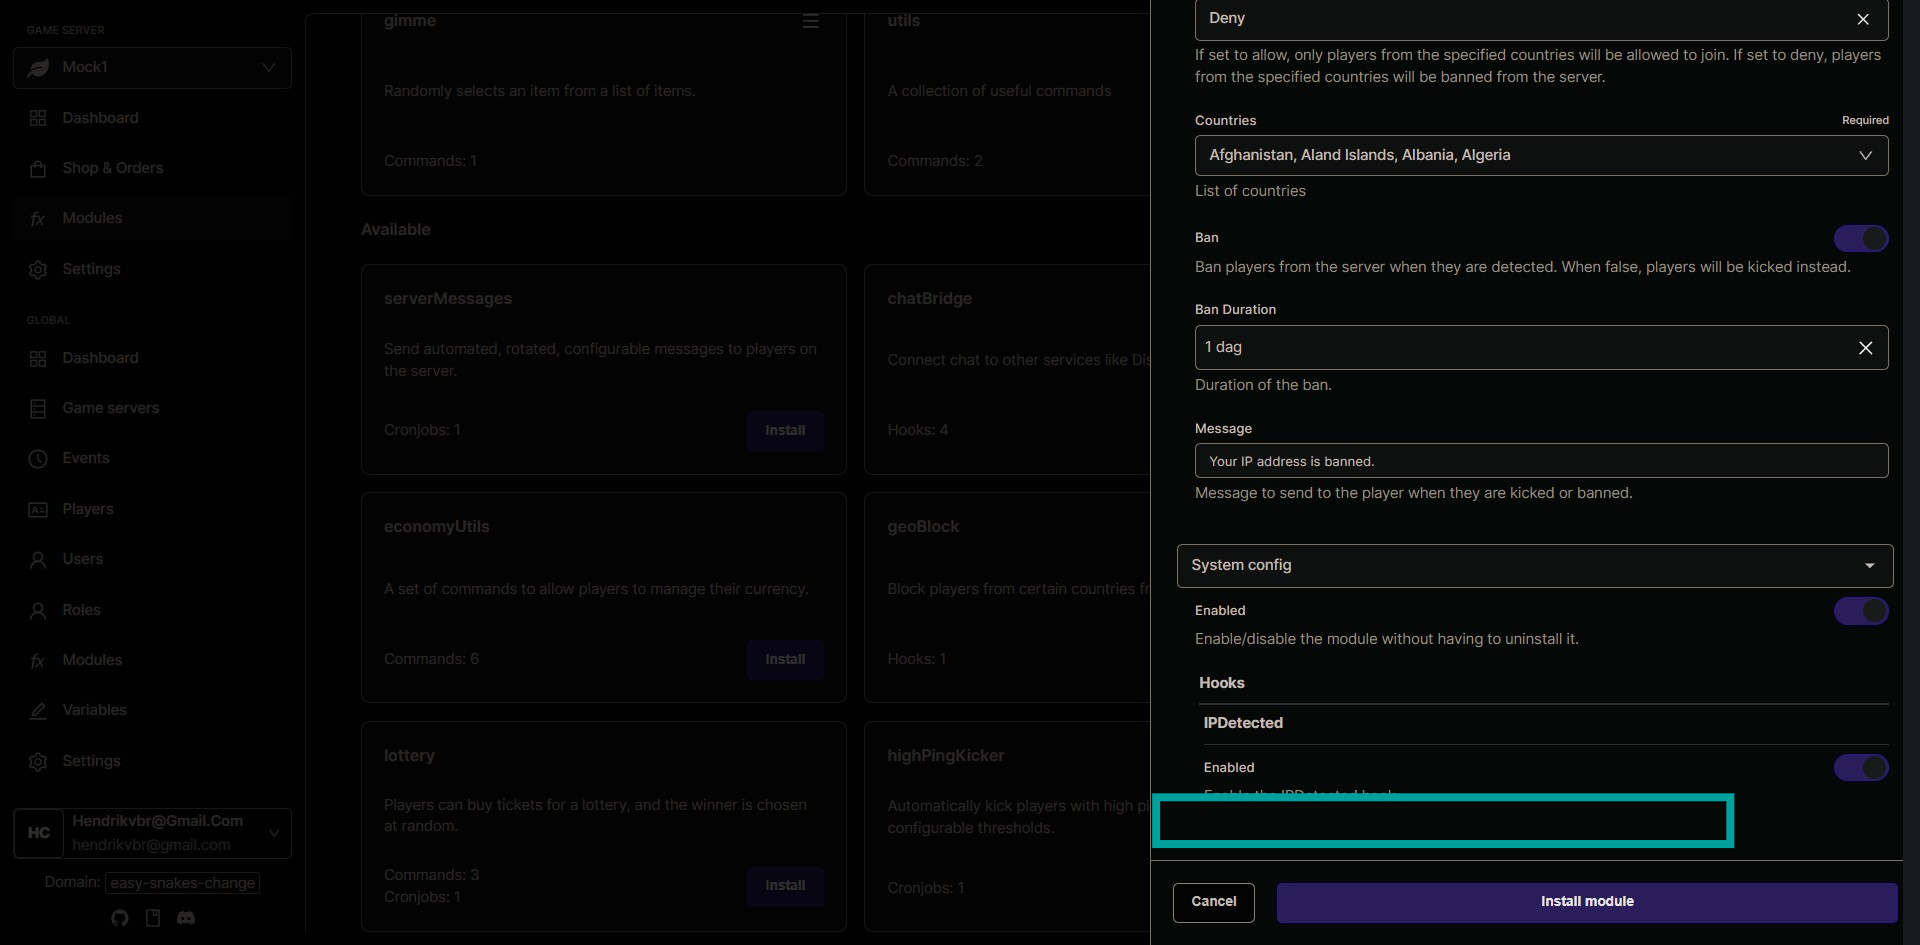
Assign the permission to the right role
Step 5: Navigate to the Roles Section
After installing the Geoblock module, go back to the main menu and find the 'Roles' section in the administration interface.
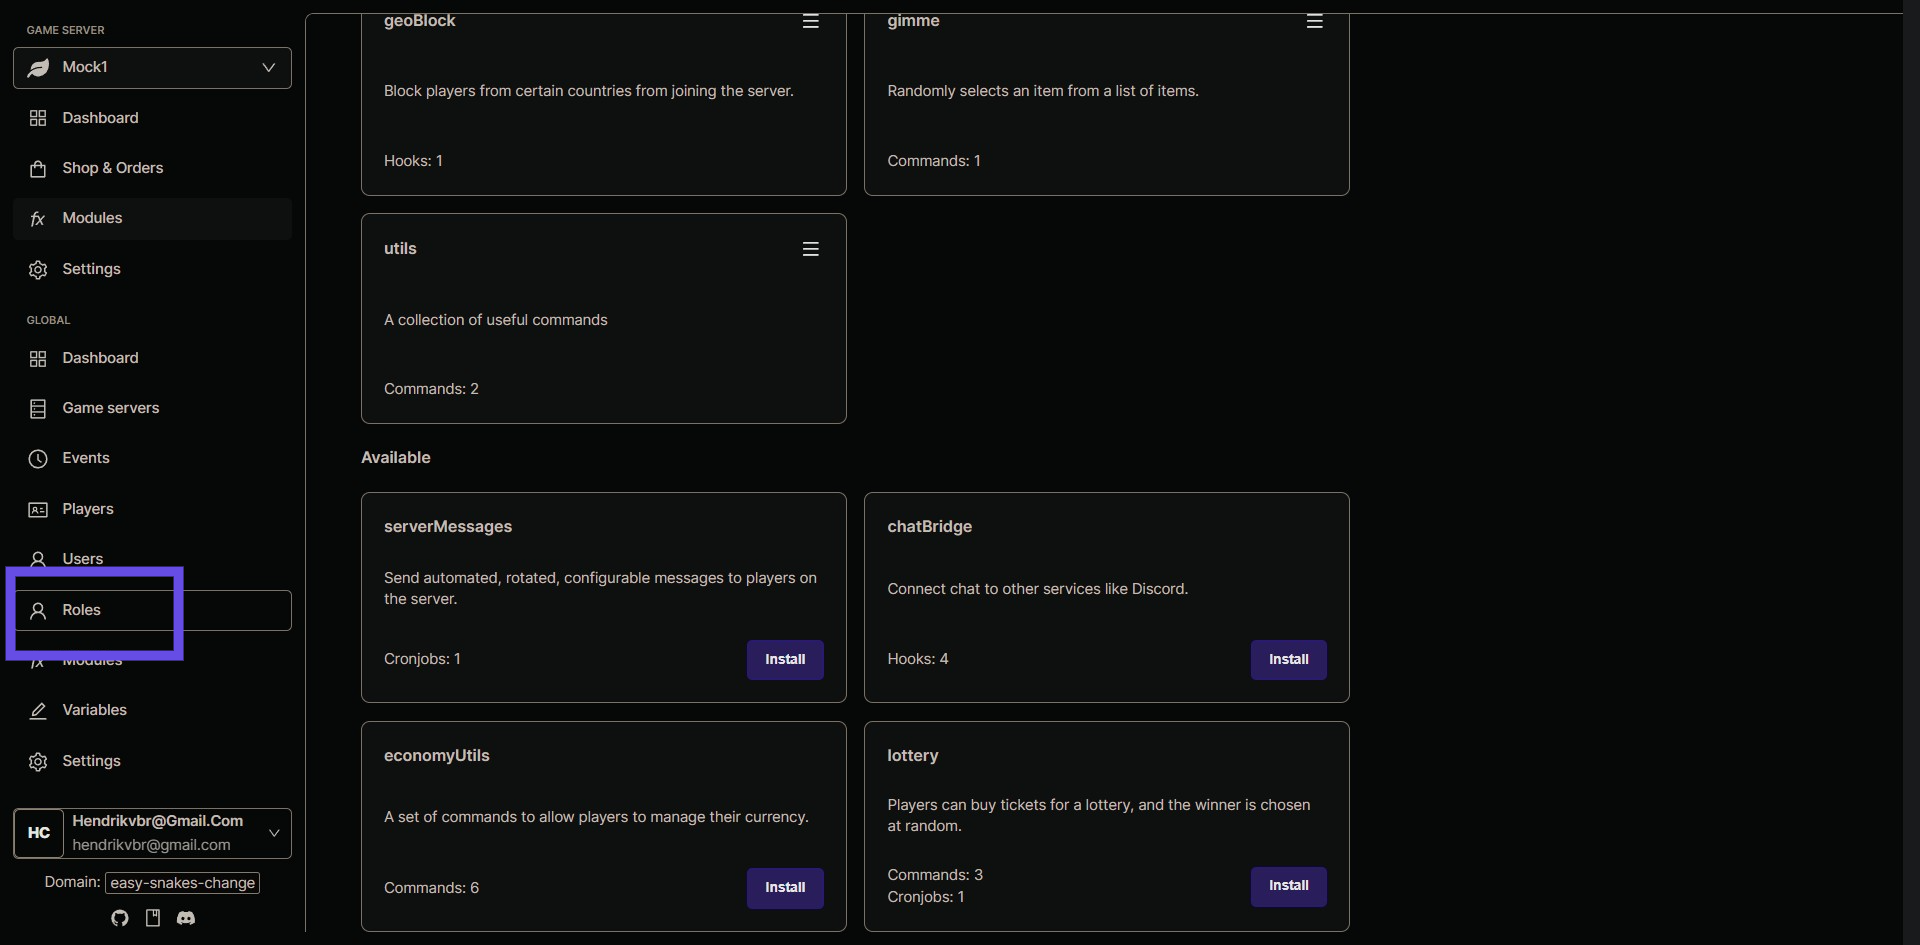
Step 6: Create a New Role
Click the 'Create New Role' button to start the process of creating a role that will grant ban immunity.
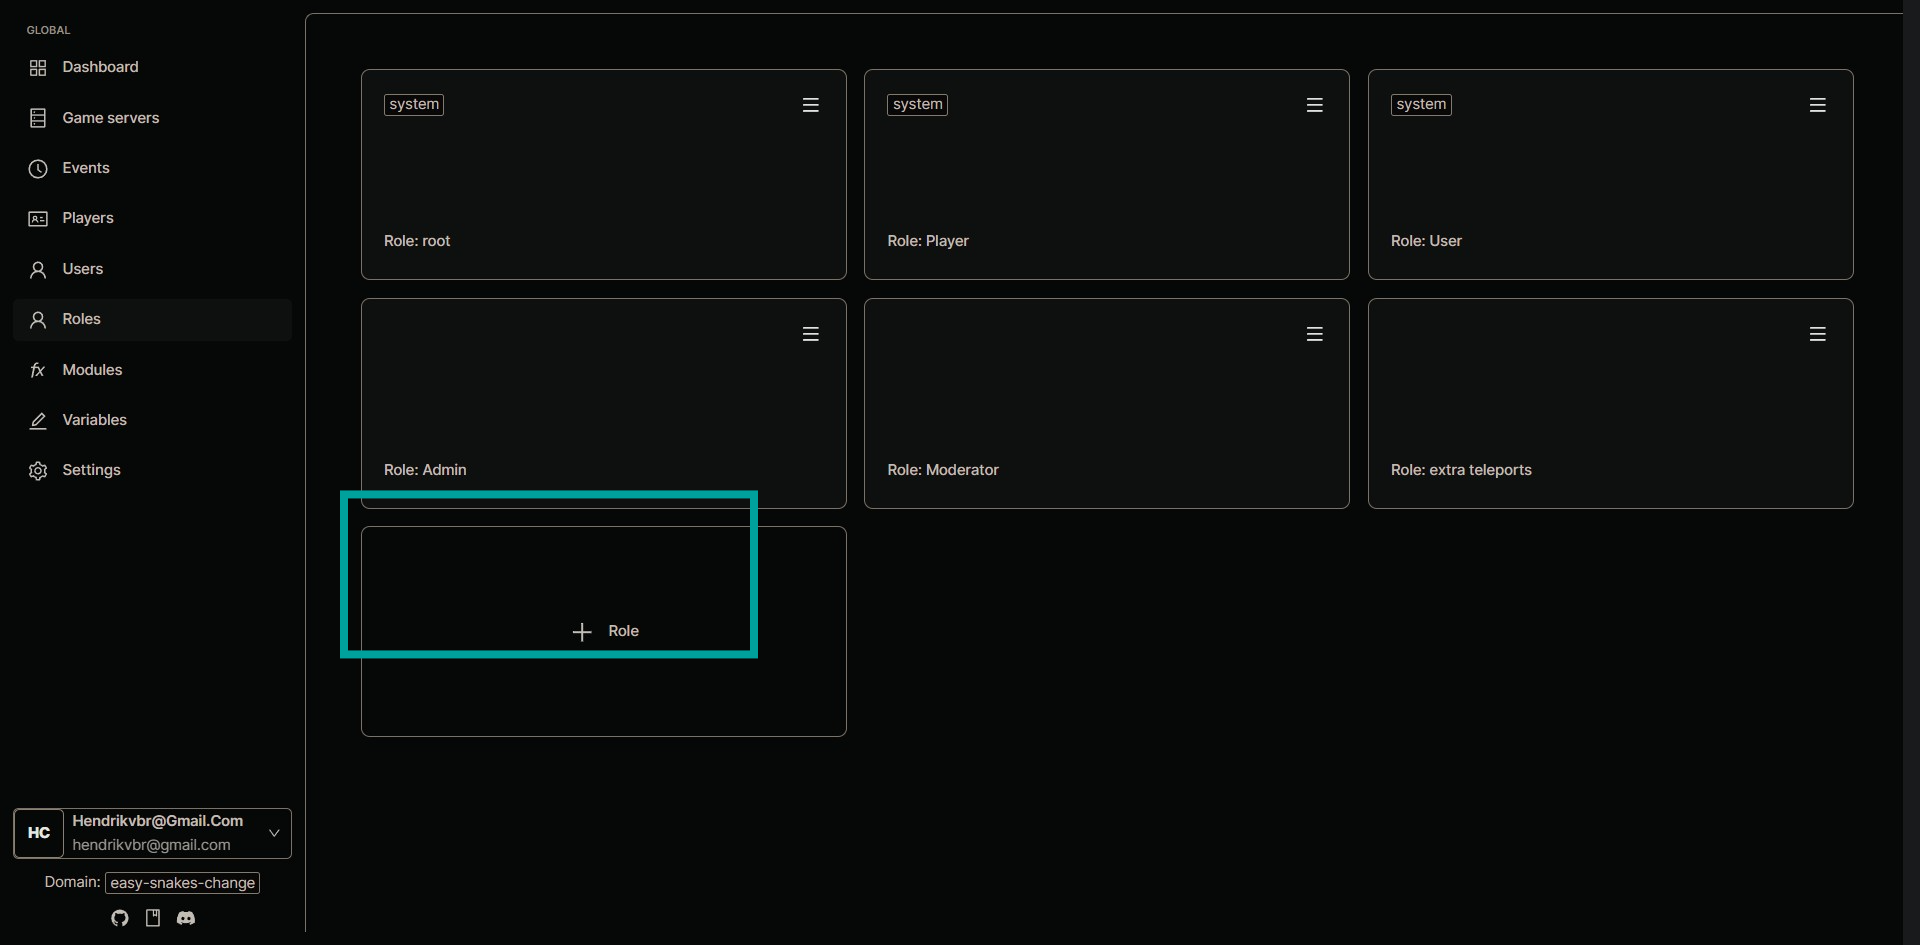
Step 7: Name Your New Role
Give your new role a recognizable name that indicates it grants immunity, such as 'Ban Immunity'.
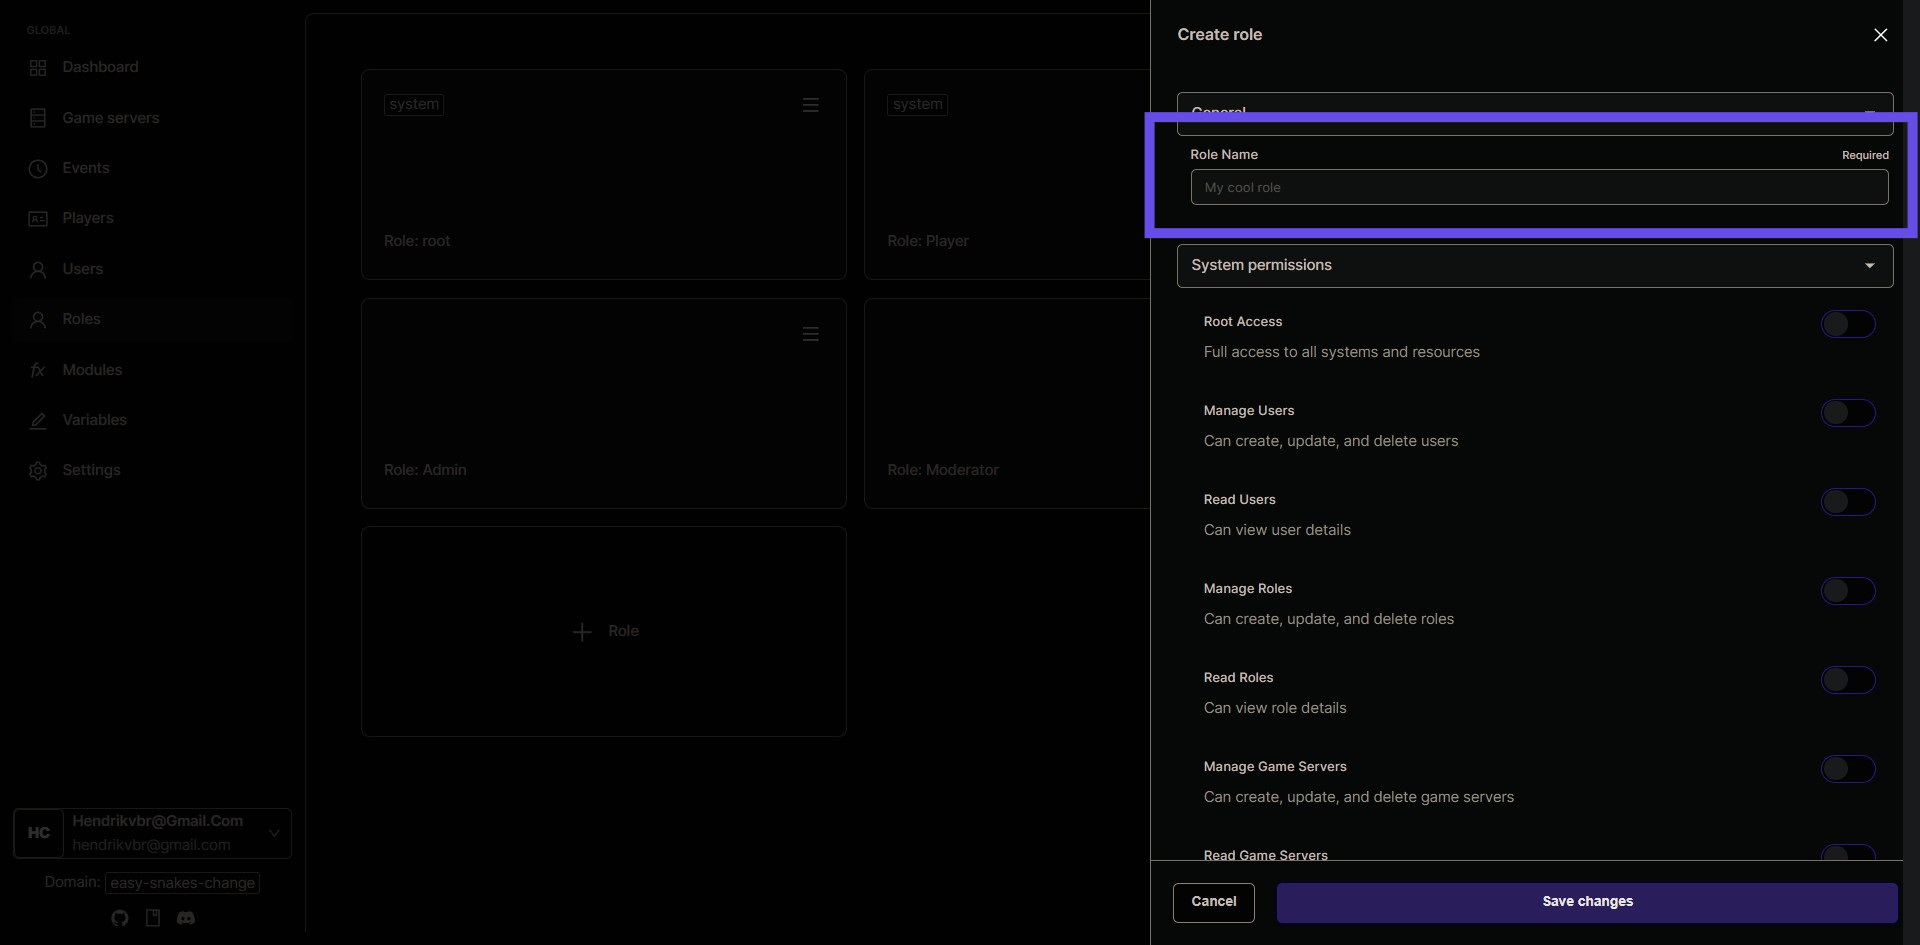
Step 8: Confirm Role Name
After entering the name, click the 'Confirm' button to save the new role.
Assign the role to the right player
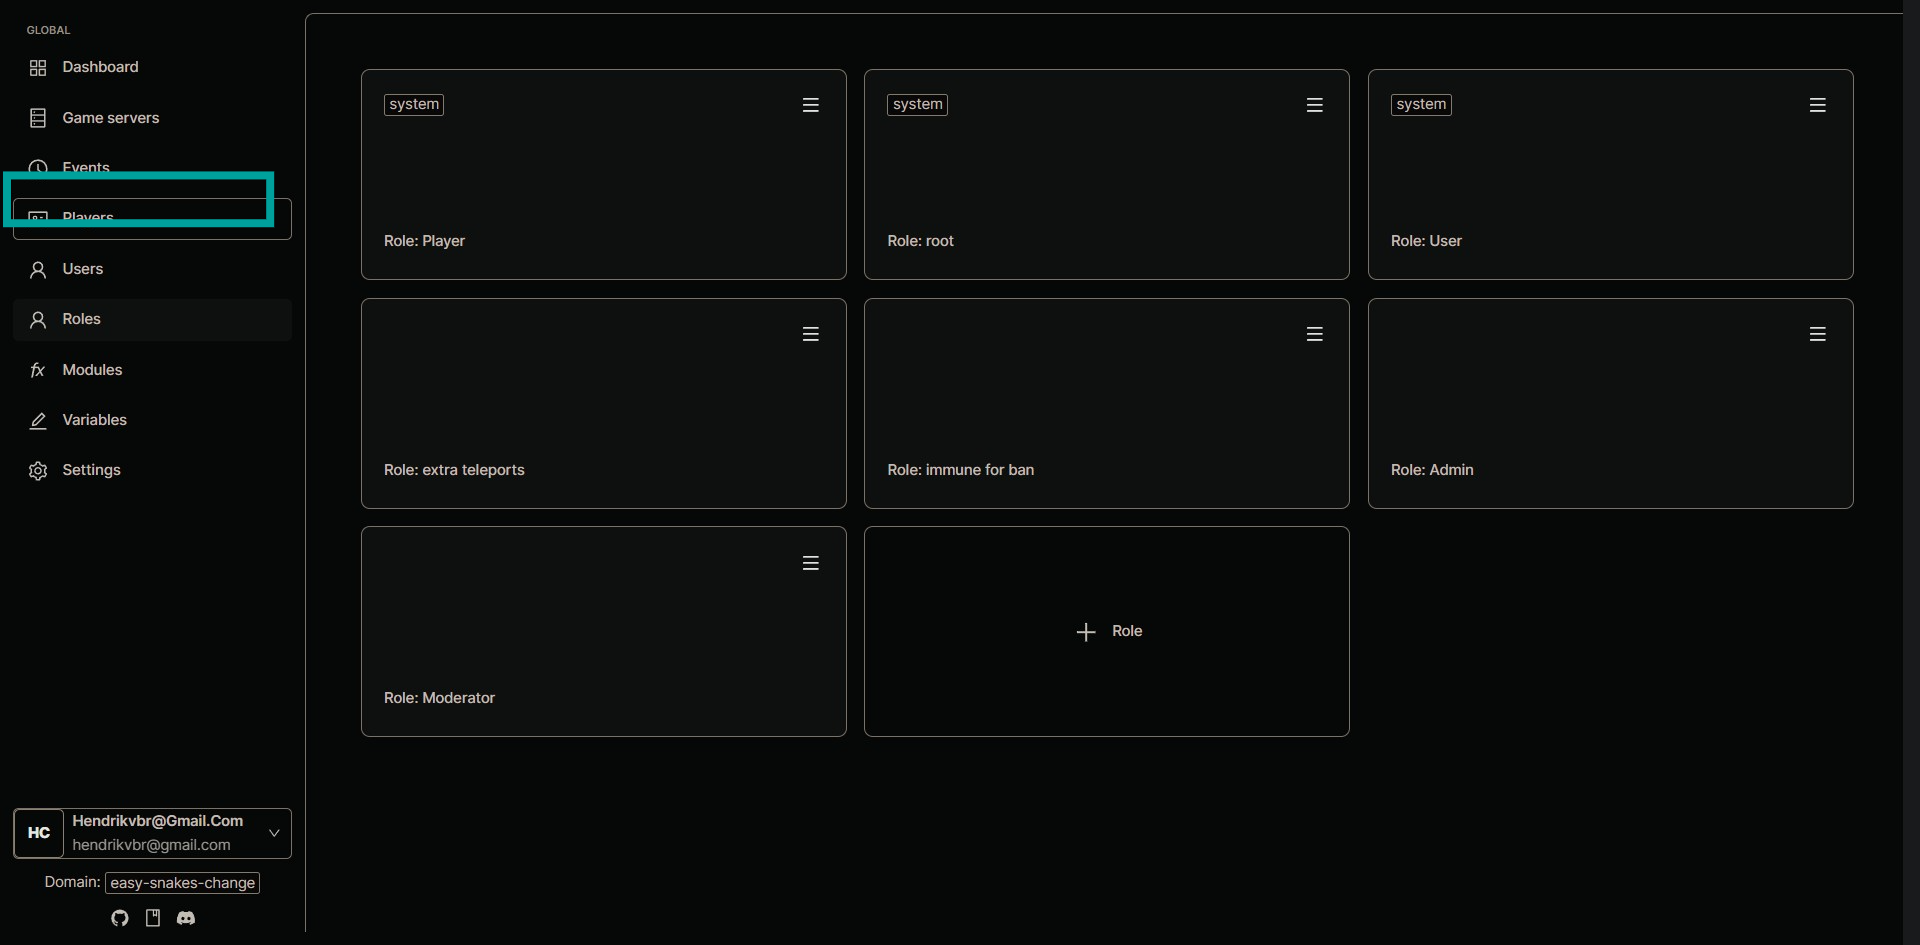
Step 9: Go to Players Section
Navigate to the 'Players' section from the main menu to assign the new role to specific players.
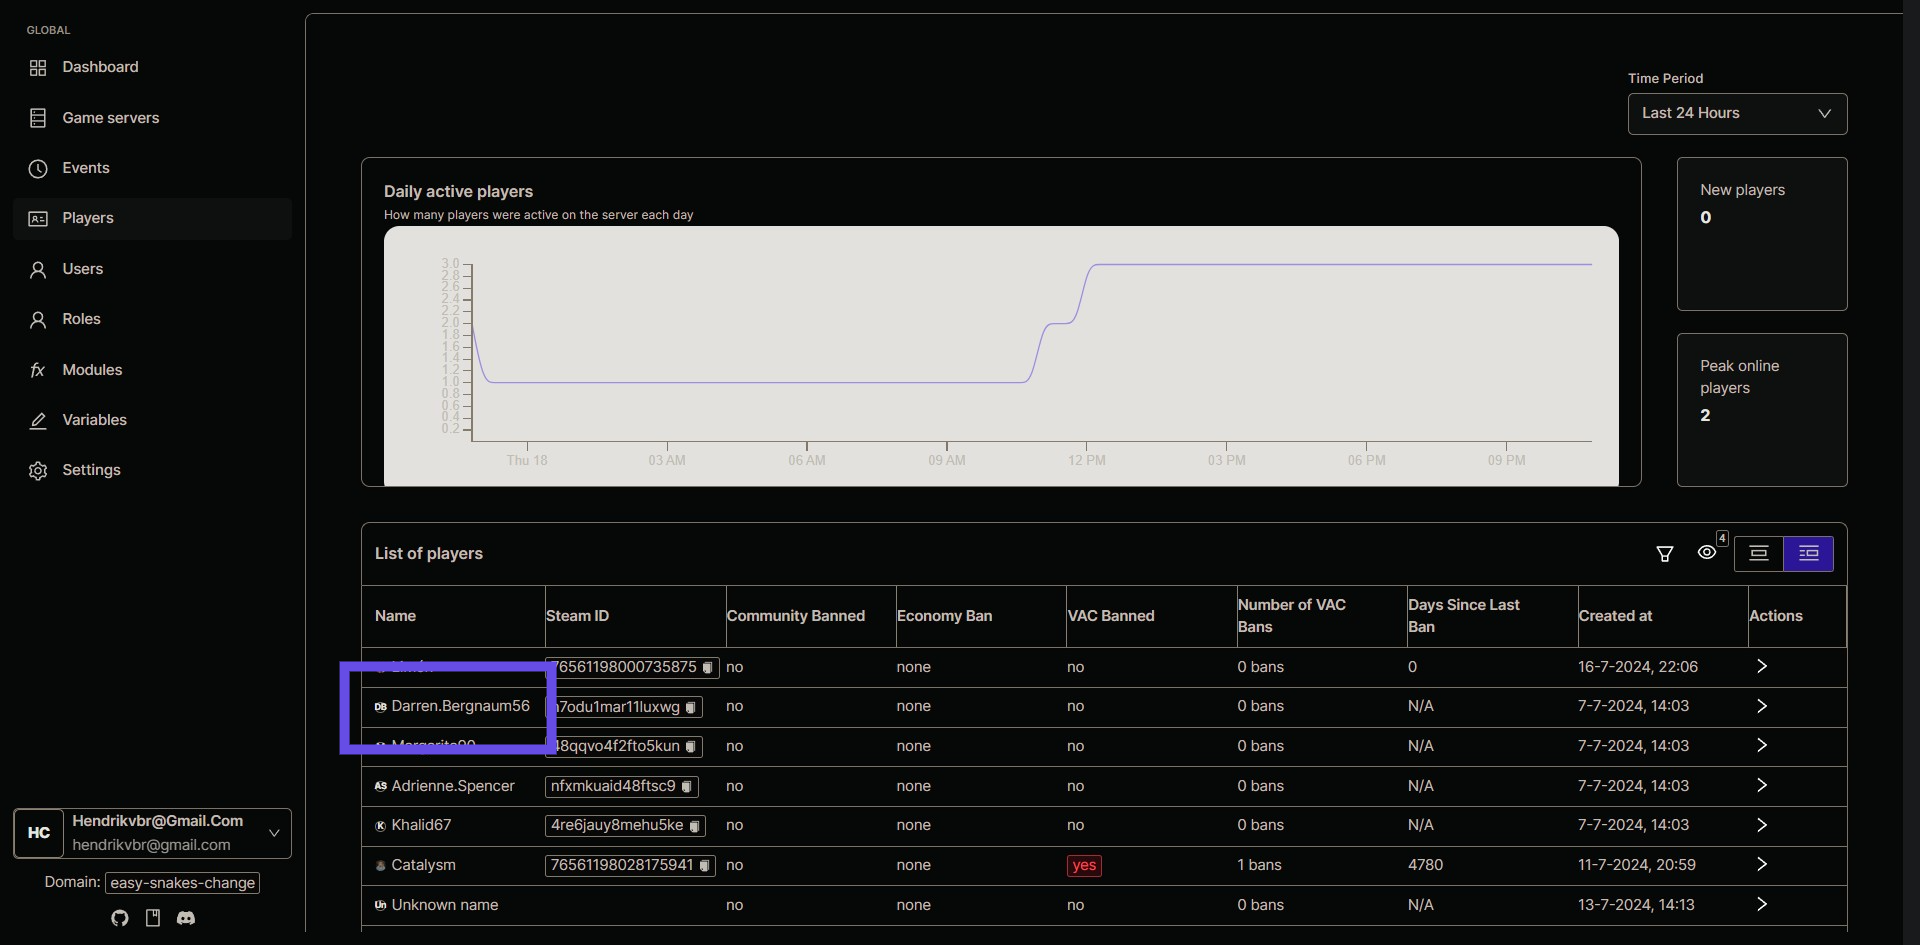
Step 10: Select Player for Role Assignment
Find and select the player you want to assign the new role to from the list of registered players.
Step 11: Assign the newly created role
Assign the newly created role to the selected player by checking the role in the player's profile.
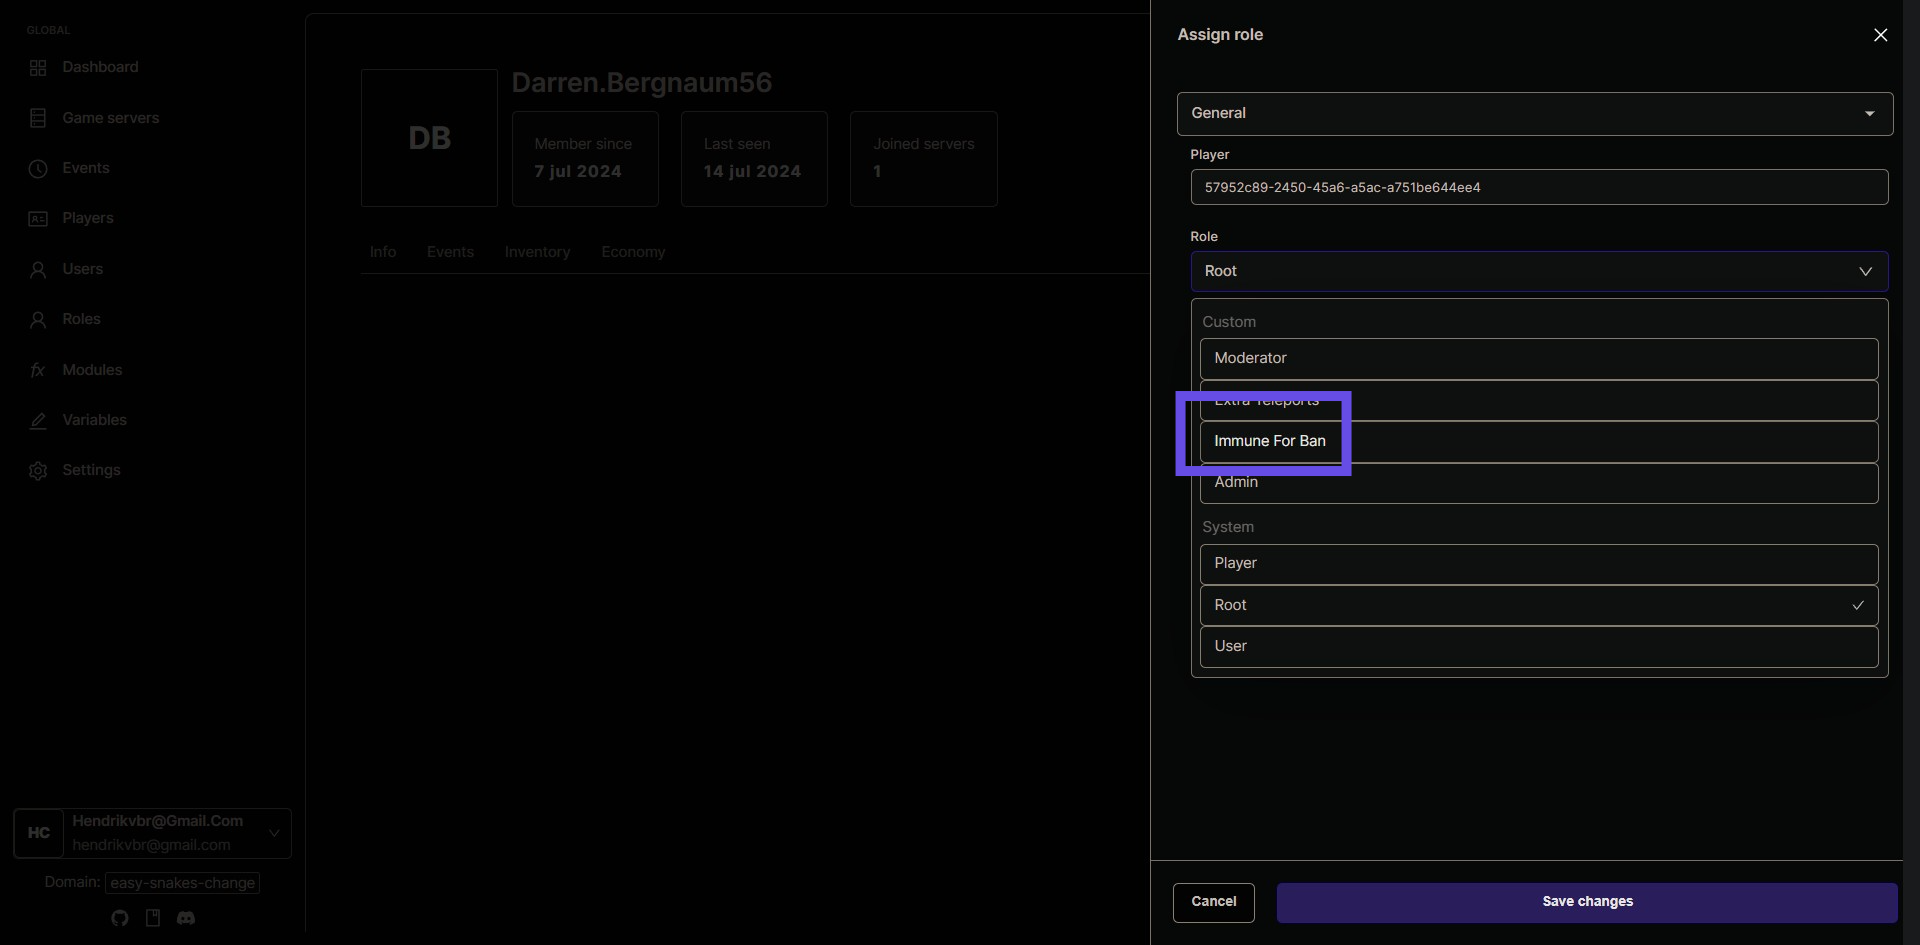
Step 12: Decide Role Activation Scope
Choose whether to activate this role across all game servers or specific individual game servers by configuring the settings as needed.
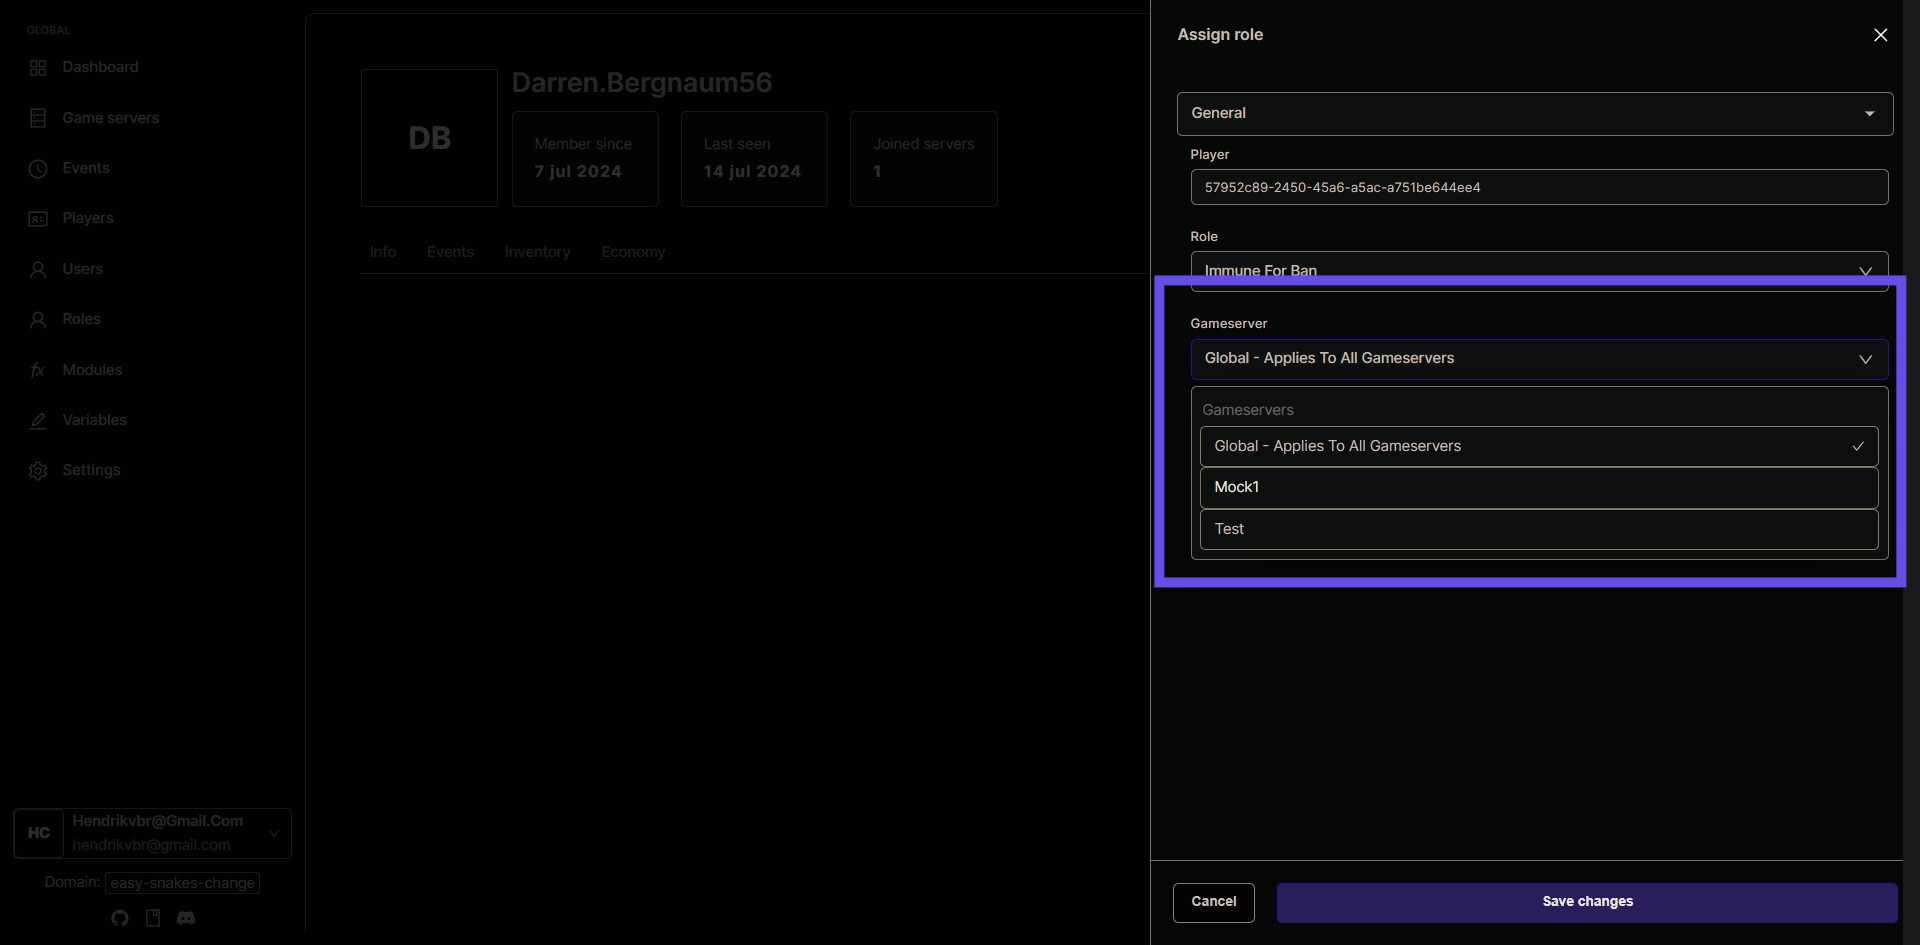
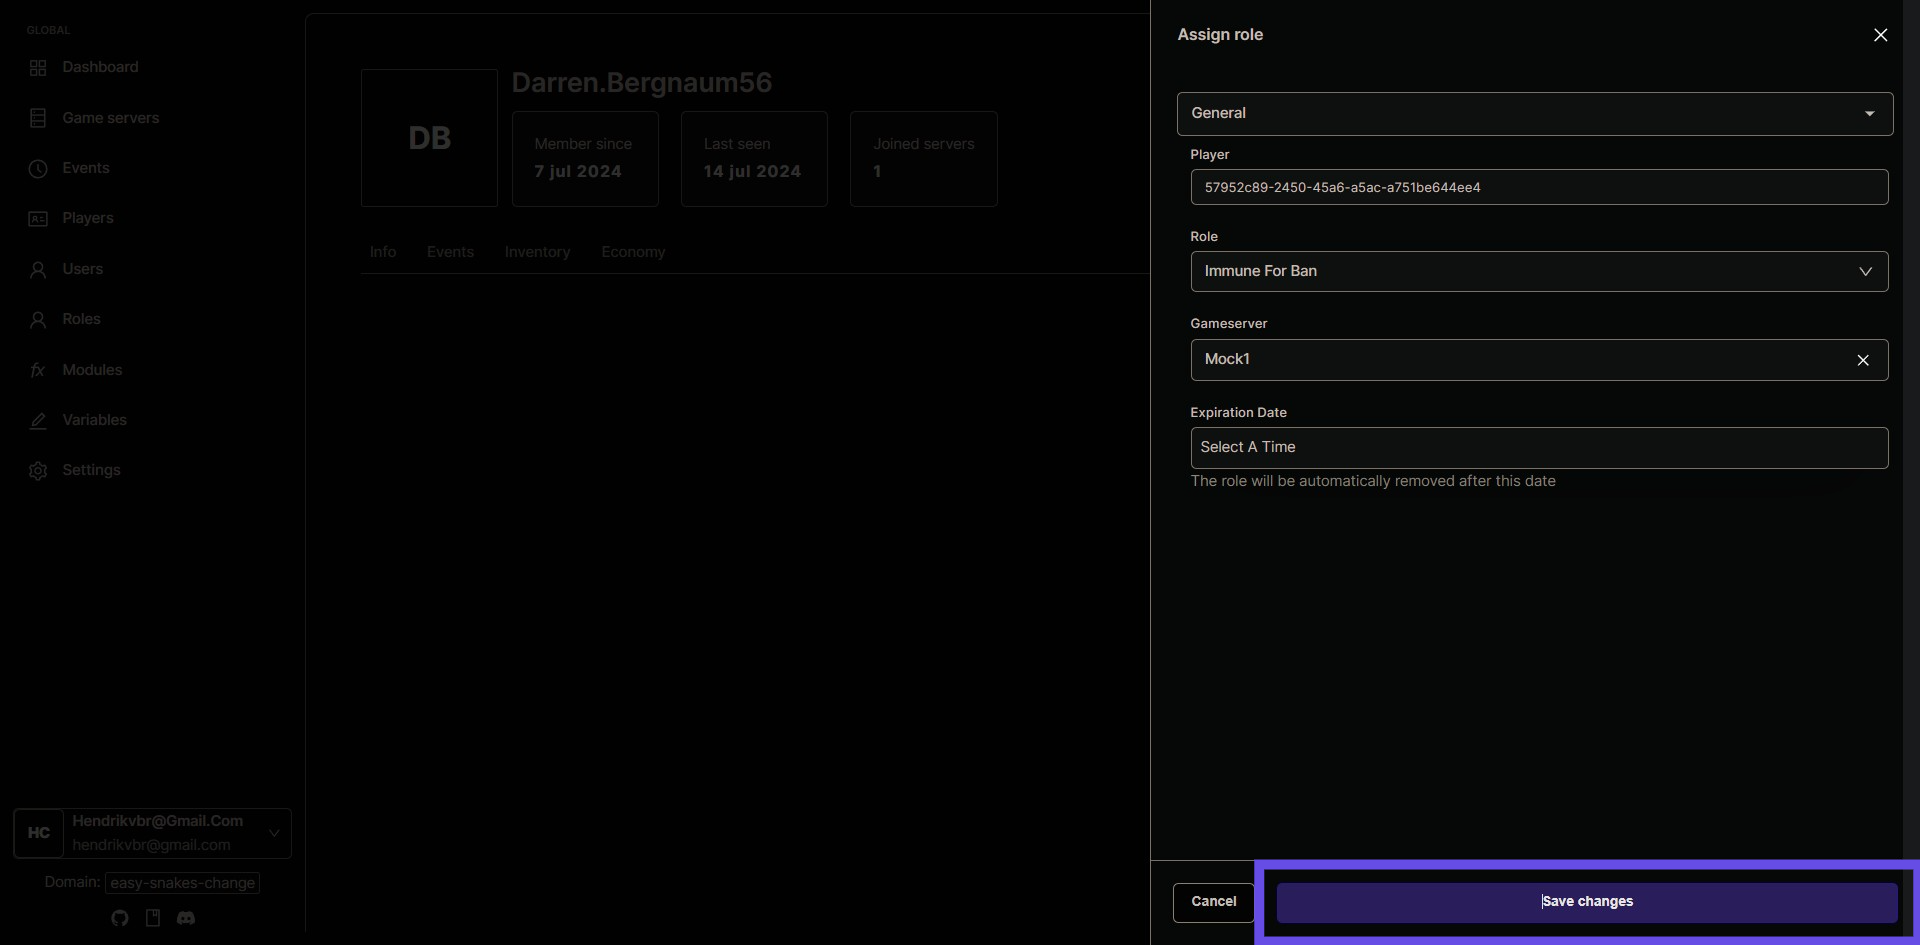
Step 13: Save Changes
Click the 'Save changes' button to apply all the configurations and finalize the process.
